Make a Pypi and Sphinx Publication GitHub Action
This tutorial will give the main step through an exemple on how to create a GitHub action script. The structure of a GitHub action script will be described and each core element to automatically deploy a Sphinx documentation on GitHub pages and the package to PyPi (and testPyPi for intermediate release).
Goal Framework
Before diving into the detail, it is good to recall the global framework that we want to obtain. This bi-function script can be resumed by the following schematic :
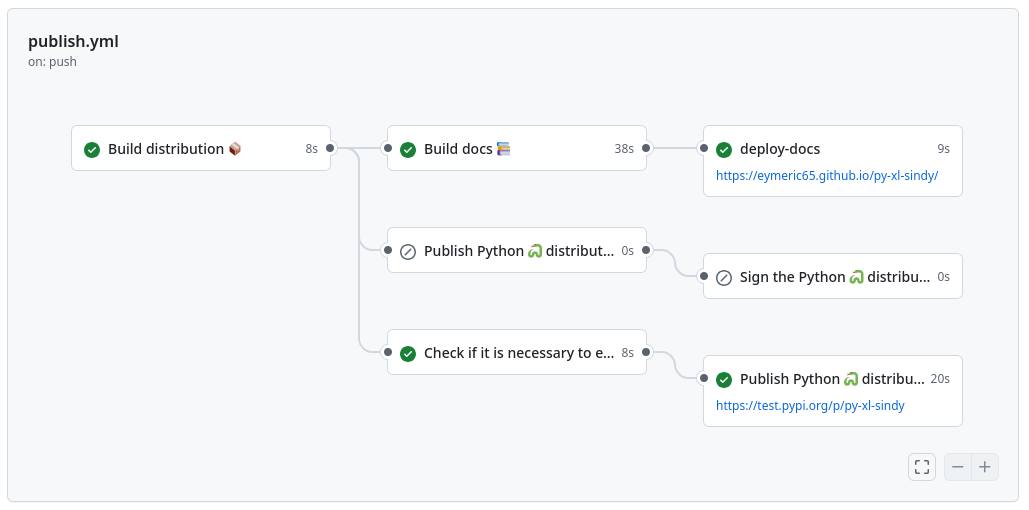
The following action need to be executed :
- Build the library to a python executable file (typically a wheel file)
- Build the documentation of the library
- Deploy the documentation to Github Pages
- Publish the python library to PyPi
- If the commit is tagged with a release, release to PyPi
- Sign the package and publish it to github release
- If the commit is not tagged, check if we push a new version (or if we update docs,…)
- If it is linked with a new version release it on testPyPi
- If the commit is tagged with a release, release to PyPi
On the following section, each part of this framework will be described.
Github Action scripting basic
The way of writing GitHub action can seems at first glance to be really easy but it undercover a lot of possible complexity.
The core of this type of scripting is to allow a really strong modularity and sandboxability between “jobs”.
The whole GitHub action script takes place in a .yml file. YAML is a human-readable data serialization language, in a way it can be seen as the successor of JSON.
A typical Github action script will be placed in .github/workflows/ and will contain the following starting clause:
- name : for the name of our workflow.
1 | |
- on : litteraly on what occasion our script will be launched.
1 | |
The first particularity of YAML can be unvailed here, a subsection title can become a value if we want, and everything in YAML need to be thought in this way… for exemple :
1 | |
will mean that the script will trigger each time we push.
- permissions : sets the permission that we will give to our action.
1 | |
- concurrency : sets the rule of what happen if we launch a new github action while the last one is already launched (overkill for our example framework)
1 | |
Basic GitHub action Job
This tutorial won’t cover each job in detail, however the complexity of github action will be progressively unveiled at each new job presented.
The first job the building one doesn’t use any complex mechanics of Github action. In this way it is the best one to understand the basic creating a job.
Each job is placed in the jobs: section of the workflow, the name is directly given through the name of the subsection after jobs: :
1 | |
The first strong point of GitHub action jobs is the free use of a set of different environment (defined through runs-on:)
1 | |